
So, you're looking to take your mechanical keyboard to the next level? You've come to the right place! Lubing your keyboard switches is one of the best (and most cost-effective) ways to dramatically improve your typing experience. It reduces scratchiness, eliminates unwanted noise, and can even make your board feel more premium. Let's dive in!
Why Lube Your Keyboard Switches?
Think of it like this: your keyboard switches are tiny mechanical devices with moving parts. Without lubrication, these parts can rub together, creating friction and noise. Lubing addresses these issues, offering several benefits:
- Smoother Keypresses: Lube reduces friction, resulting in a smoother, more consistent feel.
- Reduced Noise: Say goodbye to scratchy, pinging sounds. Lubing significantly dampens unwanted noise.
- Improved Longevity: By reducing friction, you can potentially extend the lifespan of your switches.
- Enhanced Customization: Lubing allows you to fine-tune the feel of your switches to your exact preference.
What You'll Need
Before we get started, gather these essential supplies:
-
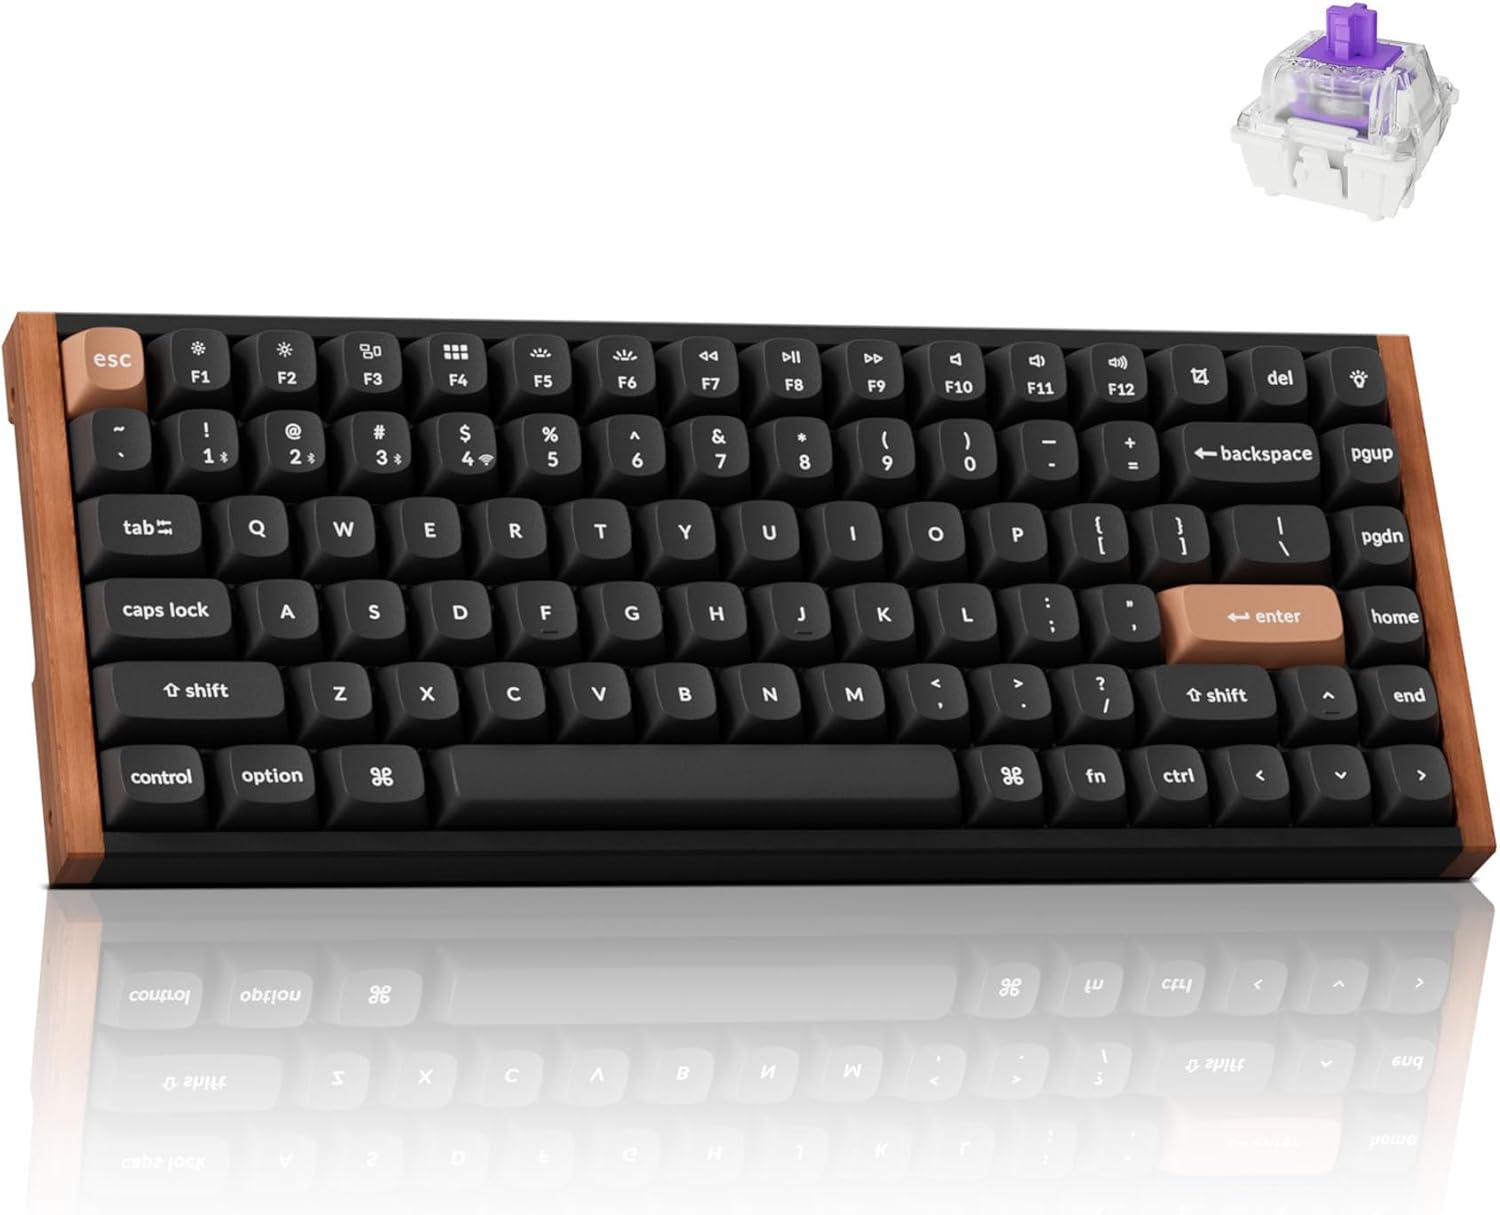
Mechanical Keyboard: Obviously! A hot-swappable keyboard like the EPOMAKER EA75 makes this process much easier. With hot-swap, you can remove the switches without desoldering.
-
Switch Opener: A specialized tool for safely opening your switches.
-
Keycap Puller: For removing keycaps without damaging them.
-
Switch Puller: If your keyboard isn't hot-swappable, you'll need this to remove the switches from the board.
-
Lubricant: Krytox 205g0 is a popular choice for linear switches, while thicker lubes like Tribosys 3203 are often preferred for tactile switches. Experiment to find what you like best.
-
Small Brush: A fine-tipped brush for applying the lube.
-
Stem Holder (Optional): Helps keep the switch stem stable while lubing.
-
Clean Work Surface: A well-lit and organized space is essential.

Step-by-Step Lubing Guide
-
Disassemble Your Keyboard:
- Use the keycap puller to remove all the keycaps from the switches you plan to lube. Store them safely.
- If you have a hot-swappable board, use the switch puller to gently remove the switches. If not, you'll need to desolder the switches – a more advanced process.
-
Open the Switch:
- Use the switch opener to carefully open the switch housing. Most switch openers have two parts; place the switch on the bottom part, then press the top part down to separate the housing.
-
Lube the Components:
- Stem: Apply a thin layer of lube to all four sides of the stem, avoiding the legs (especially for tactile switches, as lubing the legs can reduce tactility). Use a stem holder for easier handling.
- Housing (Bottom): Lightly lube the inside of the bottom housing where the stem slides. Focus on the rails.
- Spring: Some people lube the springs to reduce spring ping. You can either apply a small amount of lube to the spring or bag-lube them by placing the springs in a bag with a small amount of lube and shaking gently.
-
Reassemble the Switch:
- Carefully reassemble the switch, ensuring all parts are properly aligned.
-
Test the Switch:
- Before reinstalling the switch in your keyboard, test it to ensure it feels smooth and consistent. If it feels scratchy, you may need to re-lube it.
-
Reinstall the Switches and Keycaps:
- Once you've lubed all the switches, reinstall them into your keyboard (if you removed them). Then, replace the keycaps.
Switch Recommendations
If you are in the market for a new keyboard with great switches, here are some recommendations:
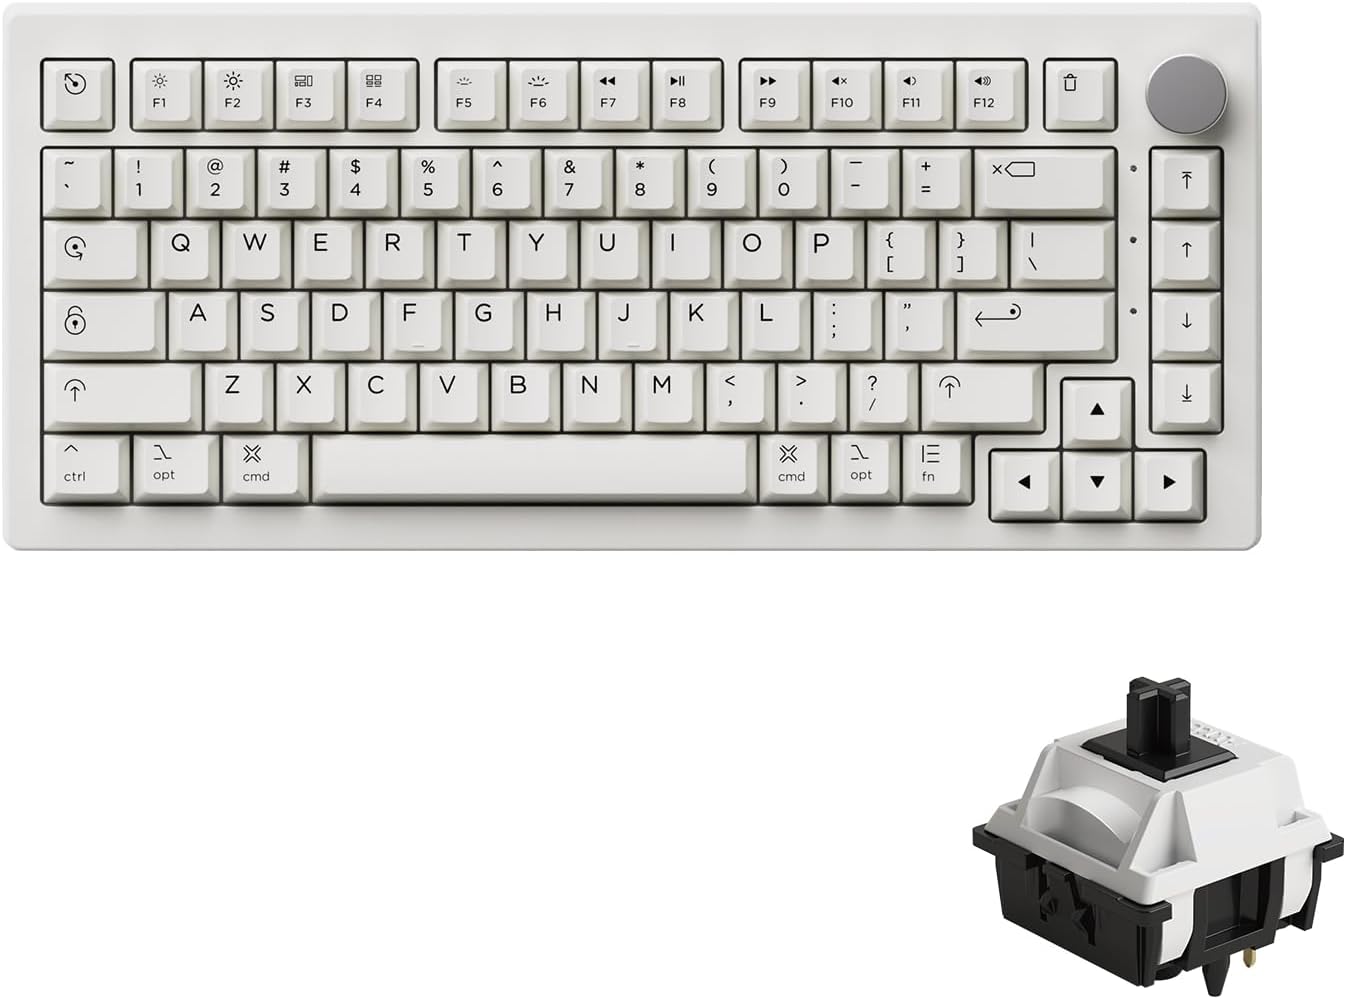
Keychron K2 HE
The Keychron K2 HE is a high-performance 75% mechanical keyboard featuring Hall-Effect Gateron double-rail magnetic switches, allowing for ultra-responsive input and customizable actuation as low as 0.1 mm.
AULA F99
The AULA F99 is a compact 96% mechanical keyboard featuring tri-mode connectivity—Bluetooth 5.0, 2.4GHz wireless, and USB-C—paired with a powerful 8000mAh battery for extended use.
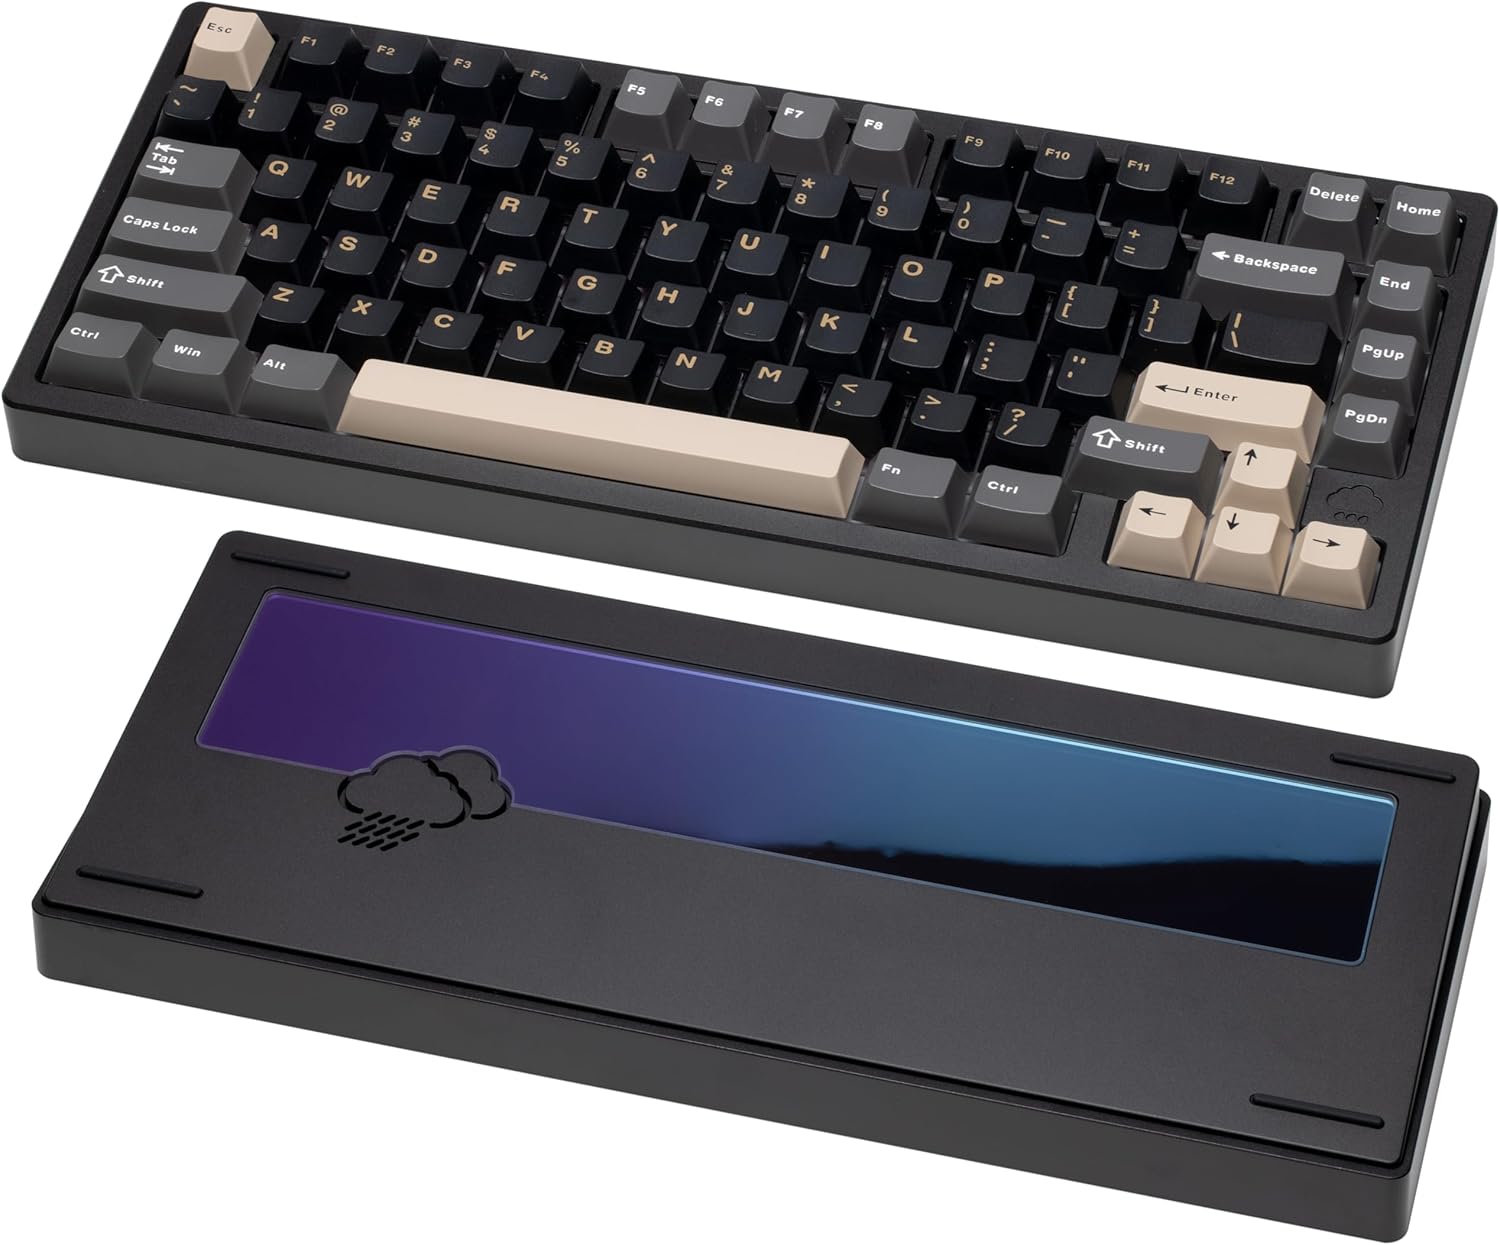
WOBKEY Rainy 75
The Wobkey Rainy75 is a minimalist mechanical keyboard built for a premium typing experience, featuring a solid aluminum case, five-layer acoustic dampening, and a gasket-mounted design for soft, quiet keystrokes.
Akko 5075B Plus Air
The Akko 5075B Plus Air is a Mac-themed, 75% wireless mechanical keyboard featuring hot-swappable sockets and durable PBT dye-sub keycaps.
Tips and Tricks
- Less is More: Apply the lube sparingly. Too much lube can make the switches feel sluggish.
- Experiment with Different Lubes: Different lubes will produce different results. Try a few to find what you like best.
- Take Your Time: Lubing switches can be time-consuming, but it's worth it. Don't rush the process.
- Cleanliness is Key: Keep your work surface clean to avoid contaminating the switches.
Common Questions
- Will lubing void my keyboard warranty? Check with the manufacturer, but generally, lubing shouldn't void your warranty as long as you don't damage the keyboard in the process.
- How often should I lube my switches? It depends on how much you use your keyboard. Most people lube their switches every 6-12 months.
- Can I lube optical switches? Yes, but the process is slightly different. Be careful not to get lube on the optical sensor.
Conclusion
Lubing your mechanical keyboard switches is a rewarding project that can significantly improve your typing experience. It takes time and patience, but the results are well worth the effort. So, gather your supplies, follow these steps, and get ready to enjoy a smoother, quieter, and more customized keyboard!
Ready to take your keyboard to the next level? Explore the EPOMAKER EA75 and other hot-swappable keyboards to make switch modification a breeze. Or, share your own lubing tips in the comments below!